The portable charger provided with the vehicle is having IEC 60309 standard and IP 64 certified. Use this portable charger for charging the traction batteries in your vehicle. This portable charger has been designed with protective circuits to prevent any danger to the vehicle due to voltage/current surges. To charge your vehicle safely, ideal time for charging would be during night.
The best practice be followed by users are: -
- The vehicle side gun must be removed if one wants to interrupt the portable charging.
- To start the charging, if the gun is connected to the vehicle, the 230V supply shall be started as soon as possible.
Portable charger Charging time - Actual may vary (these are approximate figures measured under standard testing conditions at 25 Degree Celsius ambient temperatures.
7P- 2 batteries
0 - 80% - 5 hr 14 min
80% - 100% - 1 hr 43 min
0 - 100% - 6 hr 57 min
8P- 2 batteries
0-80% - 5 hr 53 min
80-100% -1 hr 52 min
0-100% - 7 hr 43 min
Traction Battery charging ideal conditions for the vehicle: -
• Park the vehicle on the levelled surface.
• Turn the vehicle to power “OFF” condition.
• Open the seat (covered in this Owner's Manual in different Chapter).
• Take the charger from the portable charger compartment (covered in this Owner's Manual in different Chapter.).
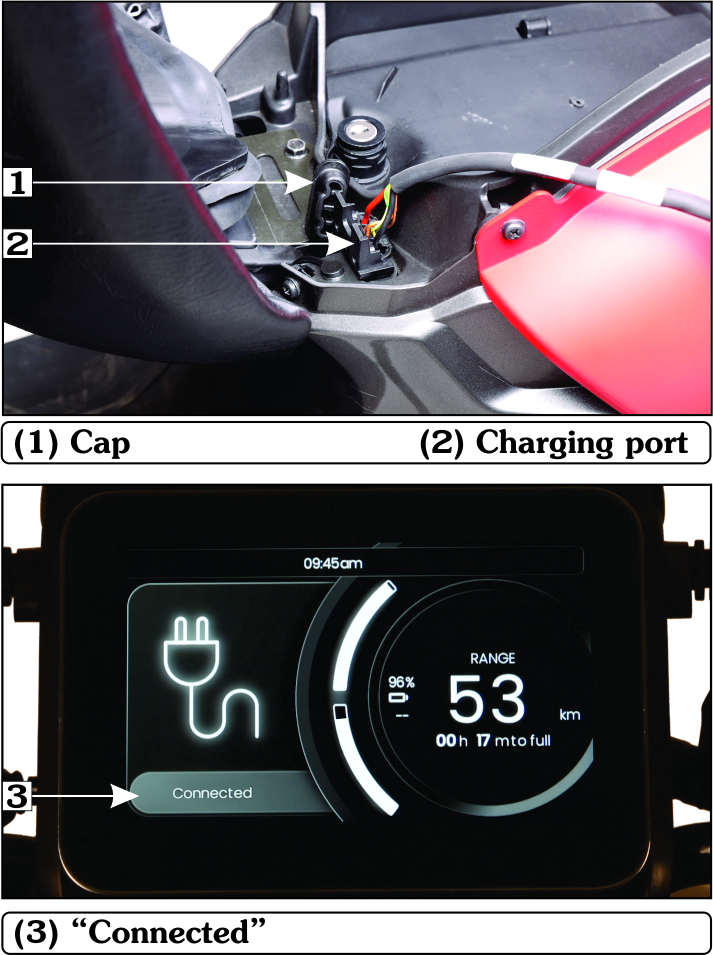
• Open the charging port cap (1).
• Plug the charger gently into the charging port (2) of the vehicle. Ensure that the charger is fully inserted into the port.
• TFT will display the “Connected” (3) screen which means that charger is connected to the vehicle properly.
• Close the seat.
! WARNING: -
Carefully lock the seat as it may result in damage of charging port and cable if the cable is not routed properly.
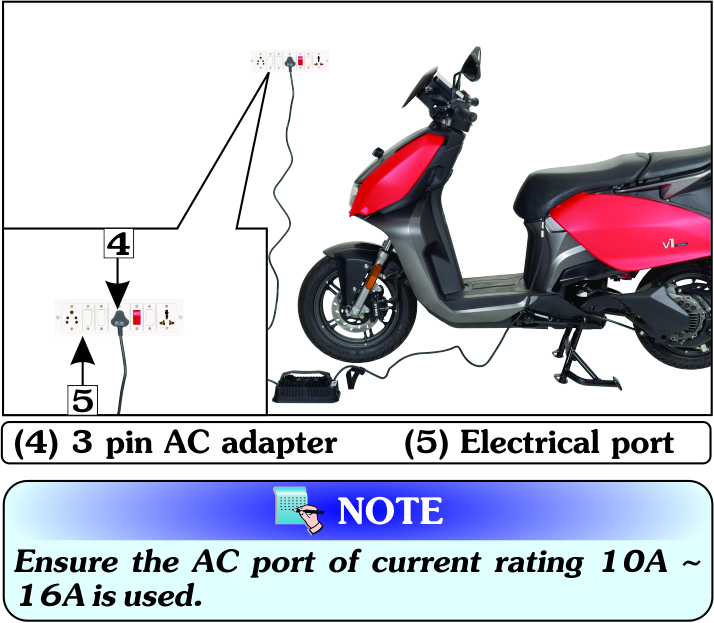
• Plug the 3 pin AC adapter (4) into the electrical port (5) and turn the switch “ON”. Ensure that the AC adapter is properly inserted into the port.
Note: -
Ensure the AC port of current rating 10A ~16A is used.
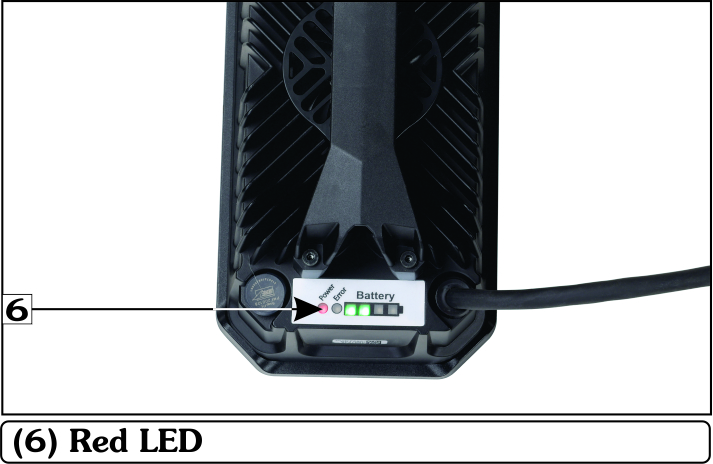
• Switch ON the power. Red LED (6) on the portable charger at “Power” will turn “ON” which indicates the power supply is stable.
• Charging will start automatically.